
How to Create a Workflow in Systeme.io (Beginner Tutorial)
-
What You’ll Need
-
📂Step 1: Navigate to Workflows
-
⚡Step 3: Choose a Workflow Trigger
-
➕Step 4: Add an Email Action
-
✉️Step 5: Edit Your Email
-
⏳Step 6: Add a Delay
-
✅Step 7: Activate and Test Your Workflow
Disclosure: Some links in this article may be affiliate links, which means I may earn a commission at no extra cost to you if you choose to purchase through them. I only recommend tools I believe are genuinely useful, especially for beginners.
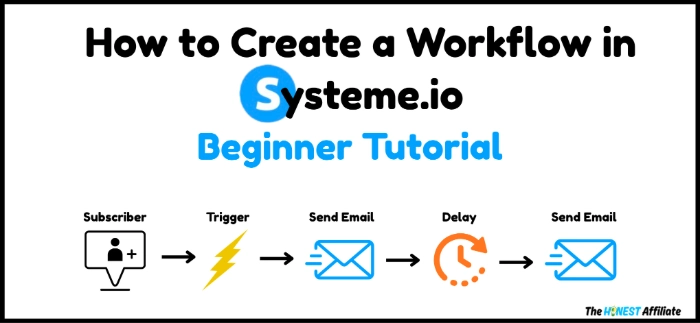
In this tutorial, you’ll learn how to create your first workflow in Systeme.io so you can automate your email marketing.
If you don't already have a Systeme.io account, you can create one here.
What You’ll Need
A free Systeme.io account.
A funnel with an opt-in form. (You can create one using my How to Create a Funnel in Systeme.io tutorial.)
A verified sender email address in Systeme.io. (Learn how to verify one in my How to Add and Verify a Sender Email Address in Systeme.io tutorial.)
By the end of this tutorial, you’ll have a fully functional workflow connected to your funnel that automatically starts whenever someone subscribes.
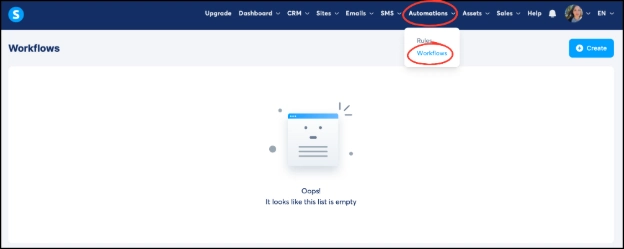
📂Step 1: Navigate to Workflows
Hover over Automations in the top navigation bar.
Click Workflows from the drop-down menu.
➕Step 2: Create a Workflow
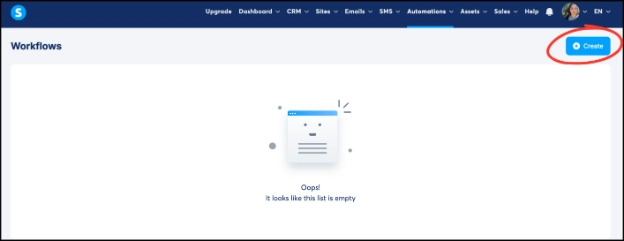
Click + Create in the top-right corner.
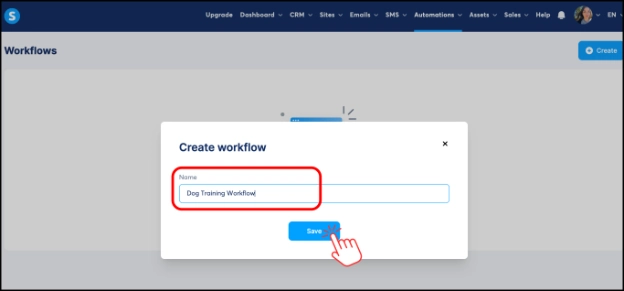
Enter a name for your workflow, then click Save.
⚡Step 3: Choose a Workflow Trigger
Open the workflow you just created.
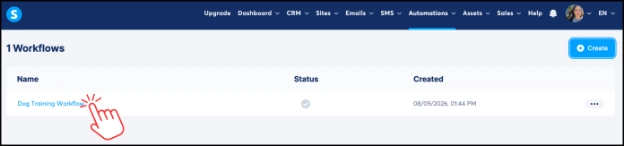
Click Create your first trigger.

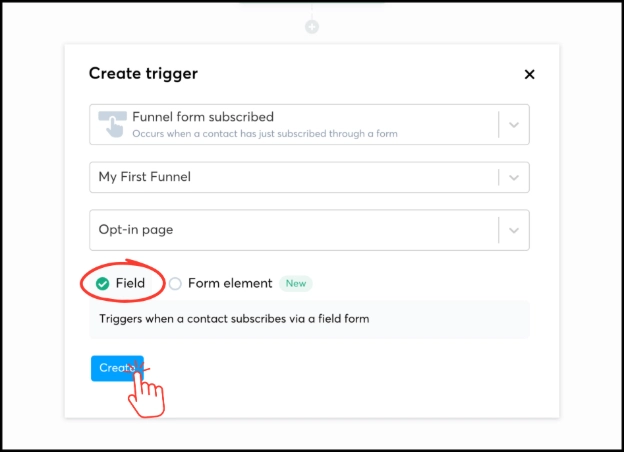
Select Funnel form subscribed.
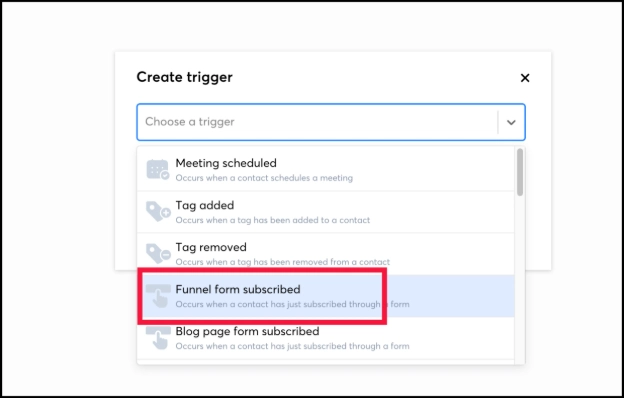
📝Note:
A trigger is what starts your workflow automatically. In this tutorial, we’ll use Funnel form subscribed, which means the workflow will begin whenever someone subscribes to your funnel.
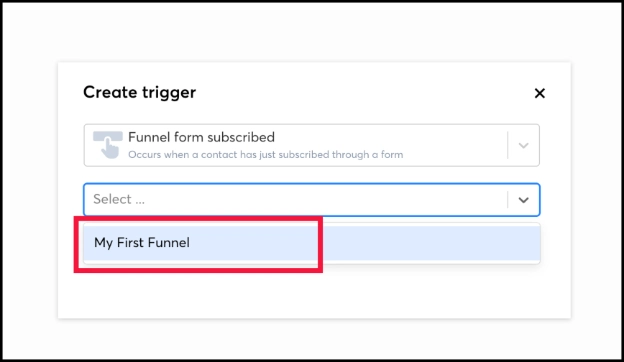
After selecting Funnel Form Subscribed, a new dropdown will appear. Select the funnel you want to use. This is the funnel where subscribers will trigger the workflow.
Another dropdown will appear. Choose the Opt-in Page because that’s where visitors enter their information to subscribe.
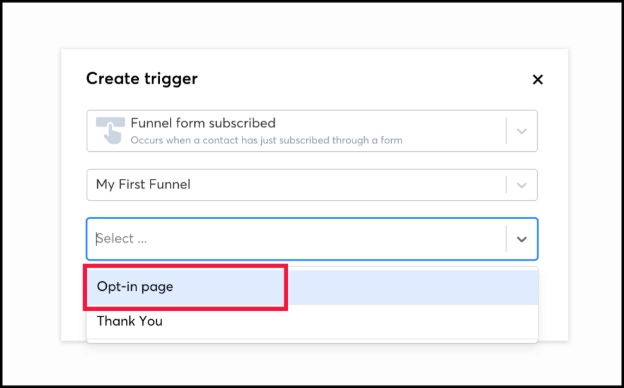
Leave Field selected, then click Create.
➕Step 4: Add an Email Action
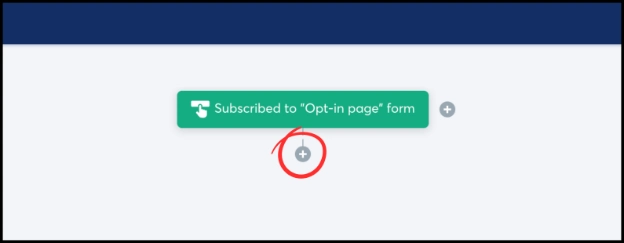
Click the (+) icon below your trigger.
📝Note:
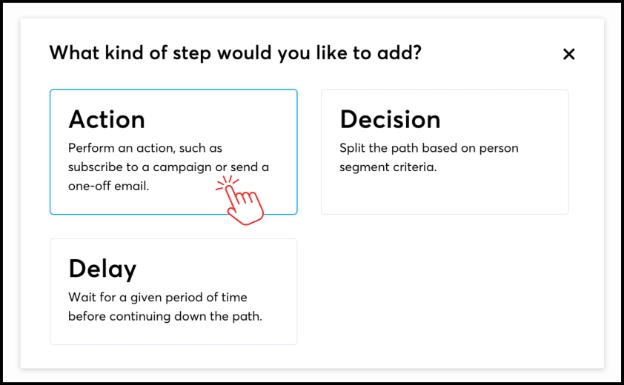
A workflow is made up of different types of steps. Actions tell Systeme.io what to do, such as sending an email, while Delays tell it how long to wait before moving to the next step.
Select Action.
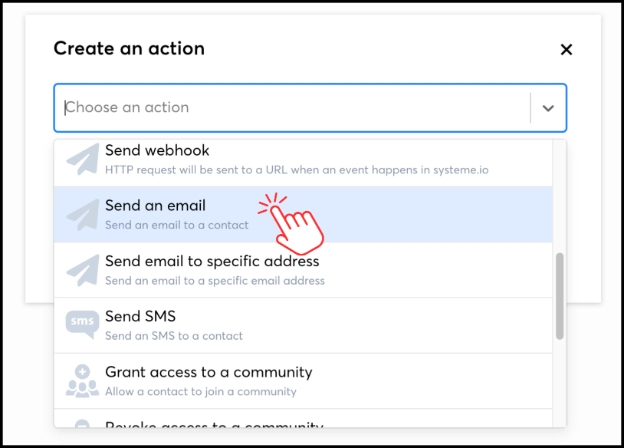
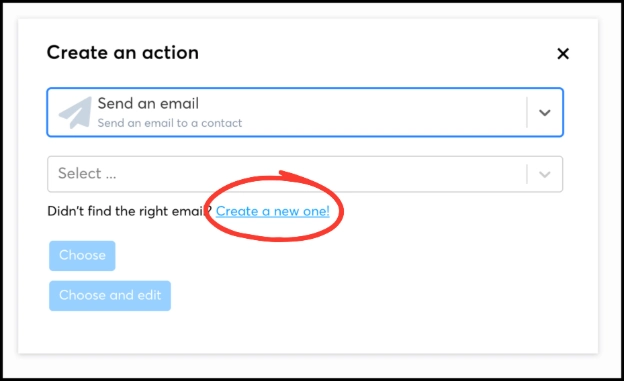
Scroll down and choose Send an email.
Click Create a new one!
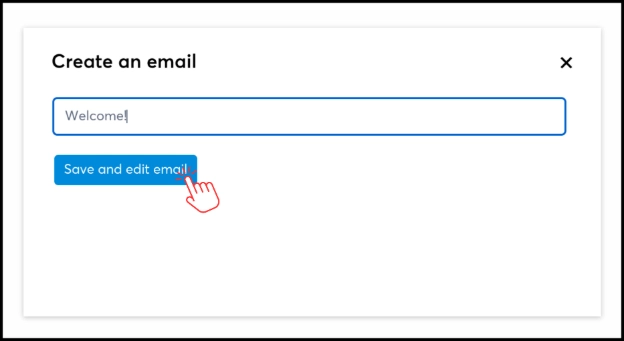
Enter a subject line for your email, such as Welcome, Thanks for subscribing, or Here are your next steps. This is the subject your subscribers will see in their inbox.
Click Save and Edit Email.
✉️Step 5: Edit Your Email
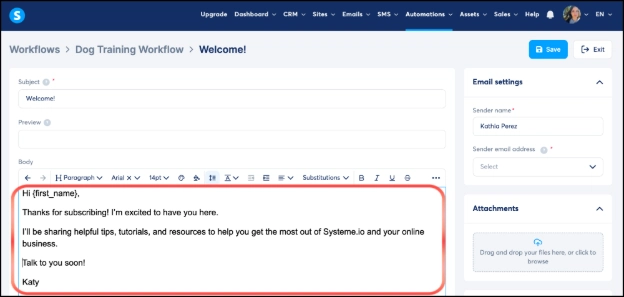
Write the email you’d like your subscribers to receive in the Body section.
Example:
If you’re not sure what to write, here’s a simple welcome email you can customize:
Subject: Welcome!
Hi {first_name},
Thanks for subscribing! I’m excited to have you here.
I’ll be sharing helpful tips, tutorials, and resources to help you get the most out of Systeme.io and your online business.
Talk to you soon!
— Your Name
💡Tip:
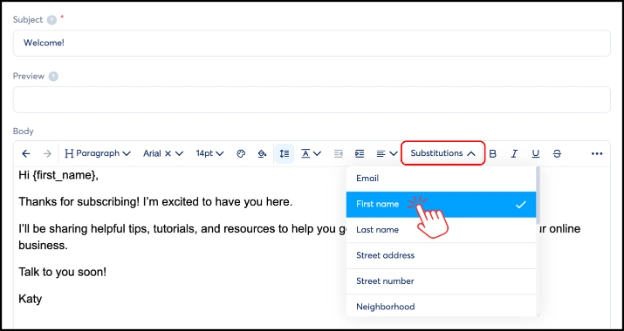
To personalize your email, click Substitute variables and choose First name. Systeme.io will automatically replace {first_name} with each subscriber’s first name when the email is sent.
Under Email settings, enter the name you’d like your subscribers to see in the Sender Name field. This can be your name or your business name.
Under Sender Email Address, select the verified email address you’d like to send the email from. If you haven't verified one yet, you'll find a link to my sender email verification tutorial in the What You'll Need section above.
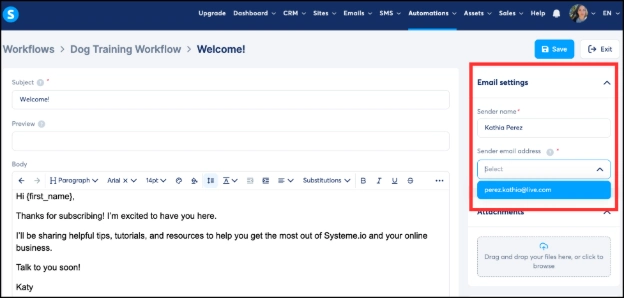
📝Note:
If you’re using a free email address (such as Outlook or Live), you may see a warning recommending a custom domain. That’s normal. Your workflow will still work, but using a custom domain can improve email deliverability. If you haven’t set one up yet, don’t worry you can always do it later.
Click Save.
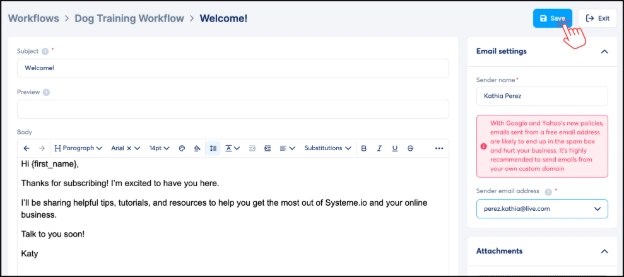
⏳Step 6: Add a Delay
Click the (+) icon below your email action.
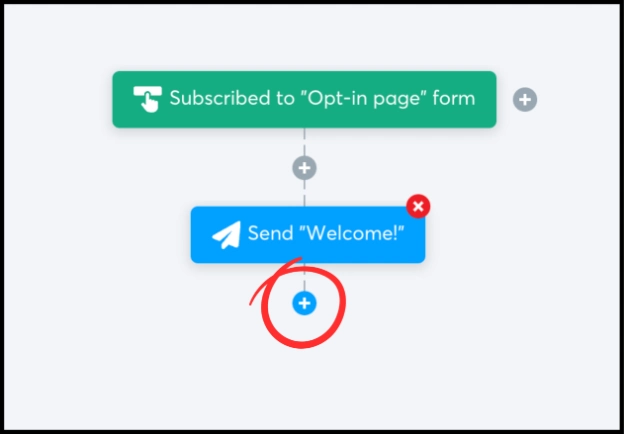
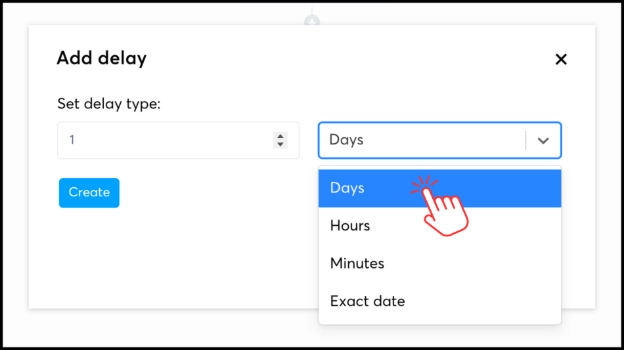
Select Delay.
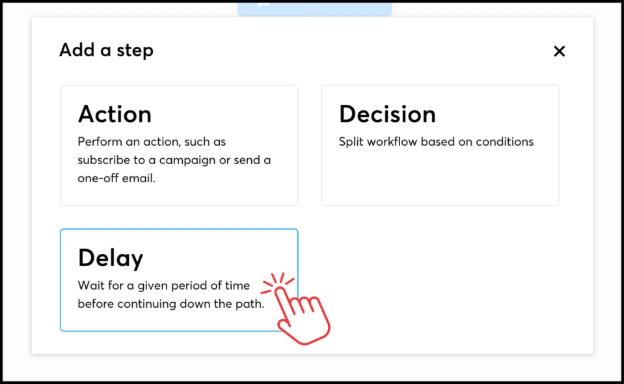
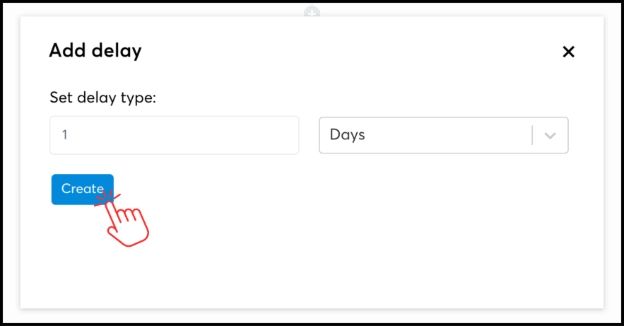
Choose how long you’d like Systeme.io to wait before sending the next email. For this tutorial, we’ll set the delay to 1 day.
📝Note:
A delay pauses your workflow before the next step runs. This is useful if you want to space out your emails instead of sending them all at once.
Click Create.
Repeat Steps 4–6 to create a sequence of emails that will automatically be sent to your subscribers over time.
✅Step 7: Activate and Test Your Workflow
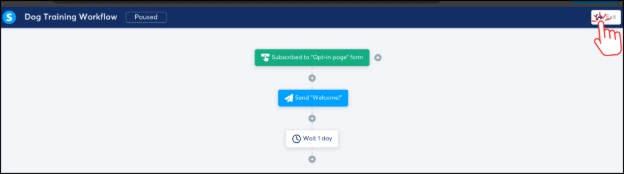
Click Exit in the top-right corner.
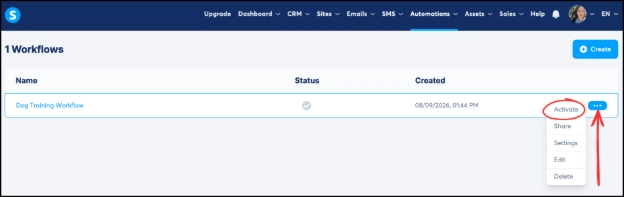
Hover over the three dots beside your workflow, then select Activate, then click Confirm.
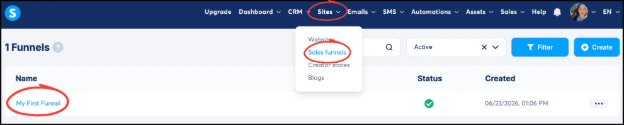
Go to Sites → Sales Funnels.
Open the funnel you connected to your workflow.
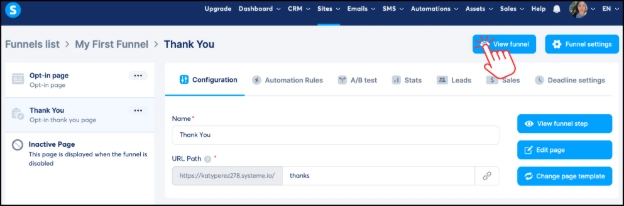
Click View Funnel.
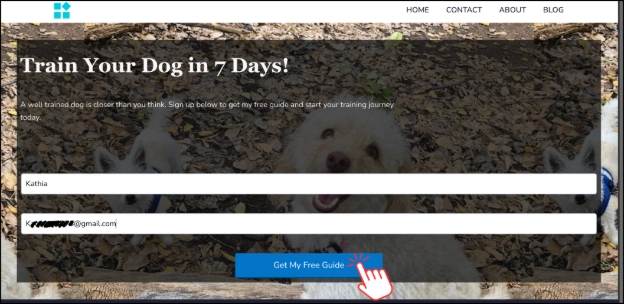
Submit the form using a different email address than the one you’re using as the sender.
Check the inbox for the email you created. If you’re using a free sender email (such as Live or Outlook), you may also need to check your Spam folder or look in All Mail.
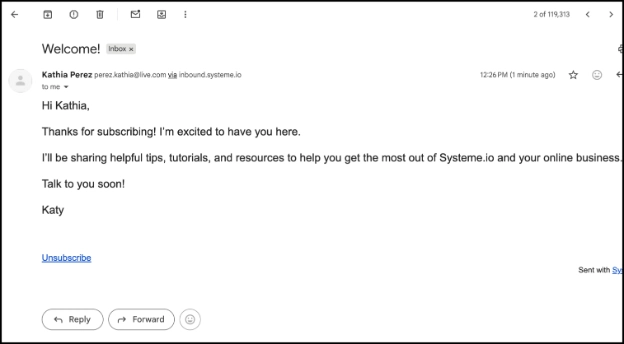
If you received the email, congratulations! Your workflow is now active and ready to automatically send emails whenever someone subscribes to your funnel.
Continue Learning Systeme.io
If you’re just getting started with Systeme.io, these beginner tutorials may help:
How to Create a Funnel in Systeme.io – Learn how to create your first funnel using a pre-made template.
How to Edit a Funnel Page in Systeme.io – Learn how to customize your funnel’s design, text, images, and buttons.
How to Create an Opt-in Form in Systeme.io – Learn how to collect email addresses with a simple opt-in form.
How to Create a Thank you Page in Systeme.io - Learn how to create a simple thank you page after someone opts in.
How to Add a Button to a Thank you Page in Systeme.io - Learn how to add a button, customize it, and link it to an affiliate offer, sales page or another URL.
How to Add and Verify a Sender Email Address in Systeme.io - Learn how to add and verify a sender email address so you can start sending emails in Systeme.io.
-
What You’ll Need
-
📂Step 1: Navigate to Workflows
-
⚡Step 3: Choose a Workflow Trigger
-
➕Step 4: Add an Email Action
-
✉️Step 5: Edit Your Email
-
⏳Step 6: Add a Delay
-
✅Step 7: Activate and Test Your Workflow
Disclosure: Some links in this article may be affiliate links, which means I may earn a commission at no extra cost to you if you choose to purchase through them. I only recommend tools I believe are genuinely useful, especially for beginners.